1 – Pendre: a Single Fairlie
After having built several Ratio-based carriages for my new project the "Dramfford Cwm Eglwys" or DCE, I noticed an unfinished locomotive in a corner of my display case. This was one of my first narrow gauge locomotives based on the RC14 Chivers kit for Snowdon Ranger and at least 20 years old. I never even painted it as it only wanted to travel on straight track whatever I did to improve the slot which should have guided the rear bogie through curves. Still, it would have been a good locomotive for my new rake of narrow gauge carriages… so something had to happen.
The first thing to do was finding photos of the old WHR: one showing Snowdon Ranger, but especially several of Moel Tryfan, to use as a reference. I removed the bogie, reversed it and filed down the coupling hook far enough for it to fit into the coupler pocket of the Arnold chassis. Now the bogie had enough space to swing, but the locomotive stuck its nose up and had to be balanced. The centre of gravity had to move forward of the rear coupled wheels. So I filled all available space at the chimney end with scrap lead. I replaced the whitemetal roof with a styrene one and glued a styrene cabin floor over the now unused bogie guiding slot. The latter was needed to prevent the light-footed driver from falling through the slot.
The firebox backhead was taken from a Dapol Pug kit and could simply be glued on to the cab floor. To the bottom of the firebox I fitted two pieces of L channel, each with a length of copper wire to represent the injector pipes. The safety valve supplied with the kit is rather coarse, so I made up a new one using brass wire, some insulation taken from the wire, and several small rings made of thin copper wire. This made up a safety valve assembly rather like the one on Moel Tryfan's photo.
More detail was added like blower pipes, grab rails, lamp irons, a whistle and a bucket of sand as illustrated in the prototype photo. The brass vacuum pipes are by Bemo. A Greenwich coupler, real coal and nameplates completed the model. I had run across several nameplates in Luton, and at Exbury Lee Bryant told me he had placed the original order for a similar set of nameplates.
Emrys Jones, the chief fitter in the DCE's locomotive shops, like that illustrious gentleman Henry Ford, knows of only one colour for second-hand locomotives, this being black. So the black Single Fairlie, when tested, proved it could negotiate through 9 inch curves on my test track. Well, it's not really a Fairlie of course, with a rigid wheelbase up front, but at least it looks like one.
Now the only thing left to do is build the DCE, the "Dramfford Cwm Eglwys", so my newly built Pendre has a layout to run on.
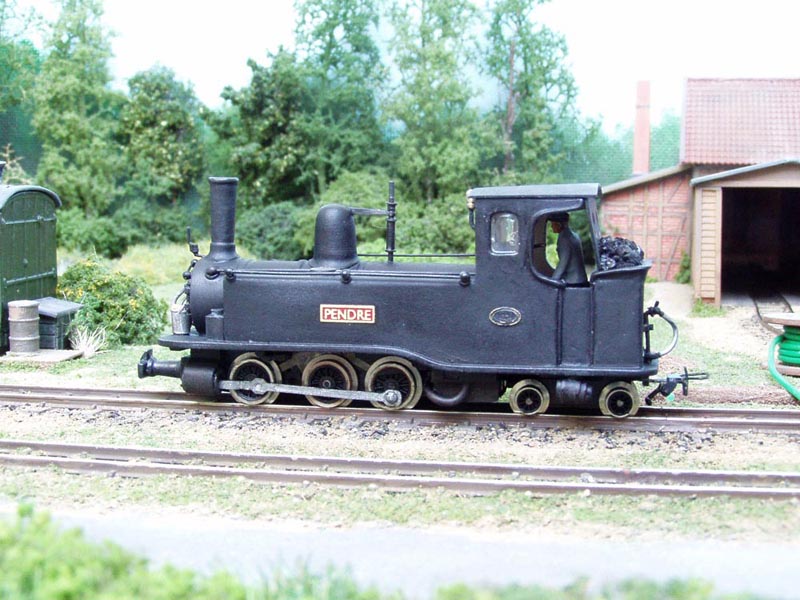
Broadside view of Pendre:
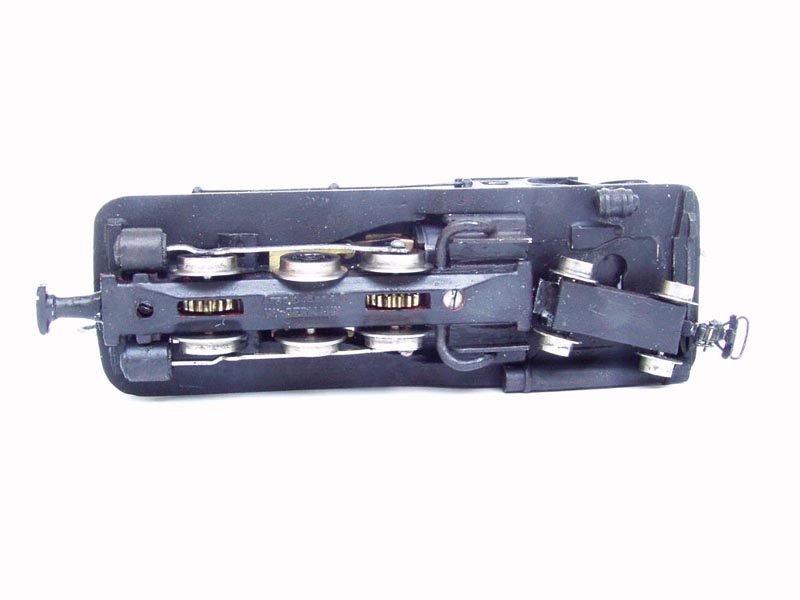
A view of the chassis, showing the bogie fitted to the rear coupler pocket:
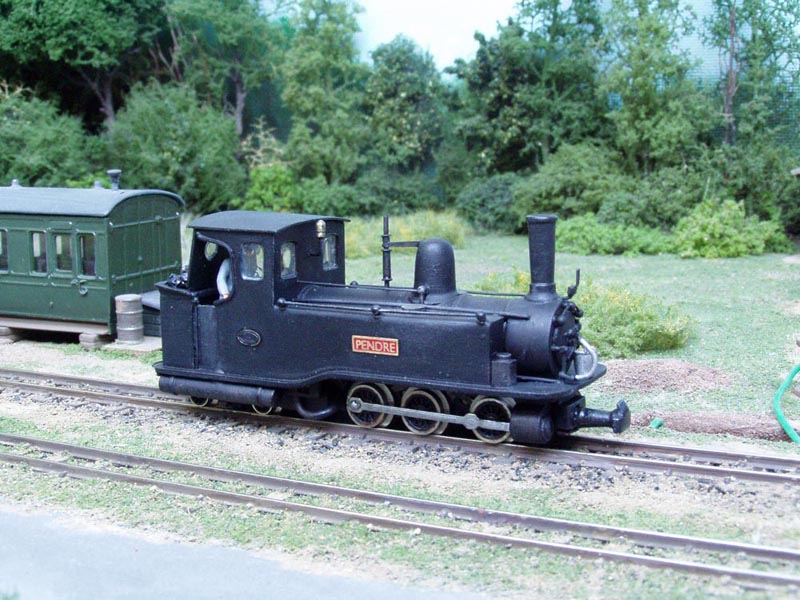
Right hand side including the air tank.
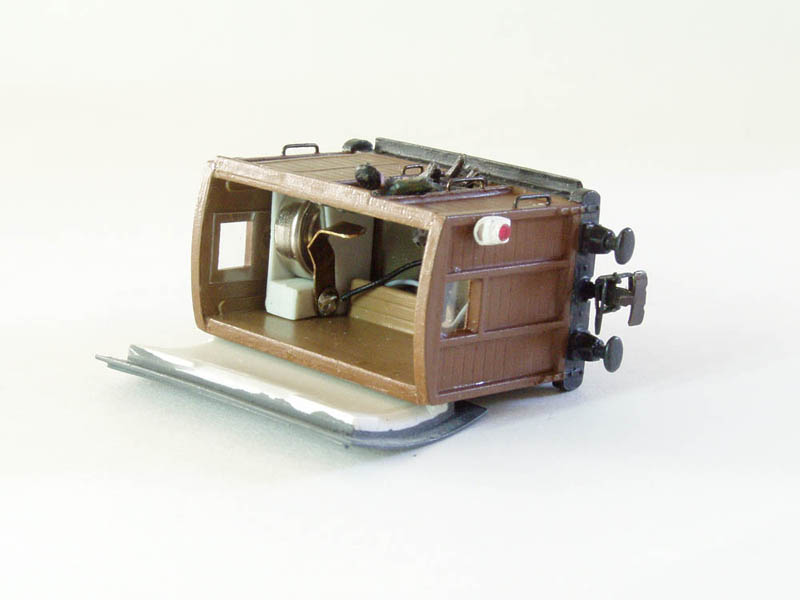
2 - Simple ‘lectric: a working tail light
When I built the ex-Corris Brake Van ( Rodney Stenning T7 ) I wanted to add a simple working tail light that wouldn't take up too much space. This brake van has an internal width of only 15.8mm, so I thought of a button-type battery to feed a 1mm LED. I once came across an inexpensive carton with various sizes and types of button cells from which I chose the AG12, this not being needed for other uses. The AG12 has a diameter of 11.5mm and a thickness of 4.2mm, and has enough power to light a LED tail light during an entire exhibition.
I made a styrene battery holder with an integrated switch which also grips the button cell so it won't fall out. The main dimensions are shown in the diagram.
I first made a groove in the bottom of part #2 in the diagram to take the wire under the positive (+) side of the cell. Then the pieces of styrene are cemented together into a tiny box. Next a hole is drilled to take the combined clip and switch. Depending on the size of the rivet (part #7), the hole in the back of the box is drilled out so the rivet shaft can be expanded and flanged inside the box once the switch is assembled.
The switch is really a spring clip out of a relay, which is bent to a shape enabling it to be rotated UP with one finger so it touches the negative (-) side of the button cell, which protrudes from the styrene pocket. A second wire is soldered to the rivet, and both wires are fitted with a miniature socket so they can be plugged on to the connections of the LED.
The styrene box was fitted into the brake van using a piece of double-sided adhesive tape, and the LED was shaped into a tail light as seen in the photos. The same procedure was followed to fit a tail light in a bogie brake end carriage.
Completed tail light unit for Ratio brake end:
Diagram:
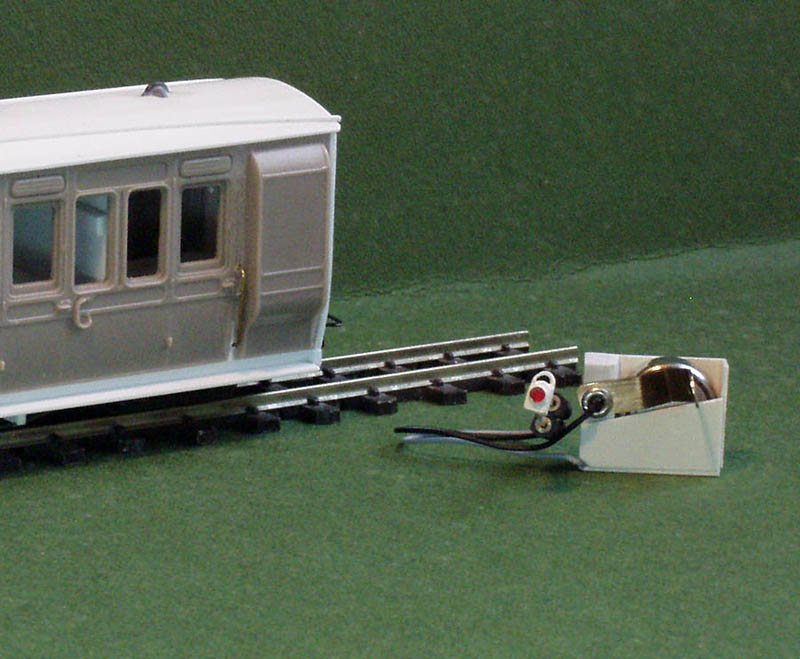
The battery assembly fitted in a Corris brake van:
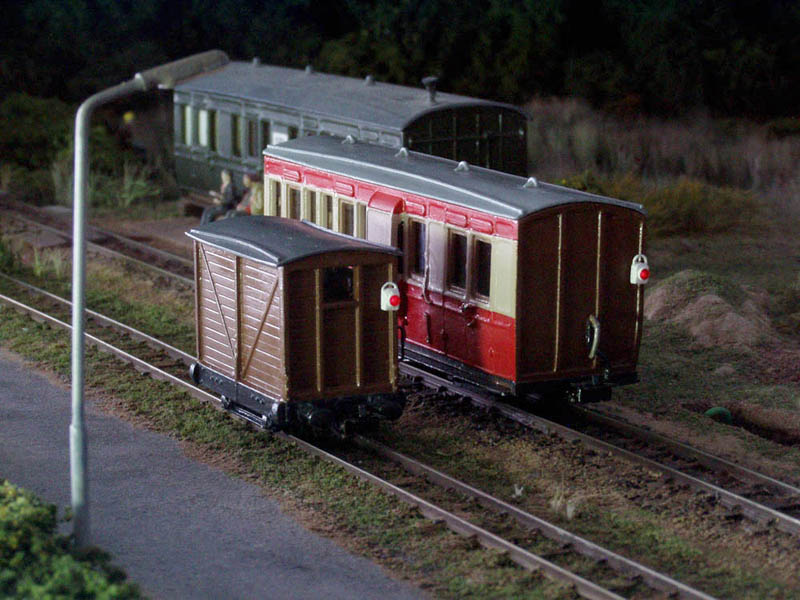
Working tail lights in the dark:
3 - Ratio Coaches for the DCE
When some time ago Mick Thornton wrote his article "Kitbashing Freelance Coaches" in the 009 News, I immediately set to work. If I would reduce the size of the carriages of Ratio origin, they would be just what was needed for my new railway, the DCE or "Dramfford Cwm Eglwys", the tramway or light railway company which will run a train service over my projected new model railway "Gorsaf Bach".
In order to determine the dimensions I first shortened a Vale of Rheidol coach (Dundas DM10 ) to five compartments to see how many compartments I would need out of a Ratio GWR carriage side. I also determined the width of the coaches as 24mm, similar to the VoR coach.
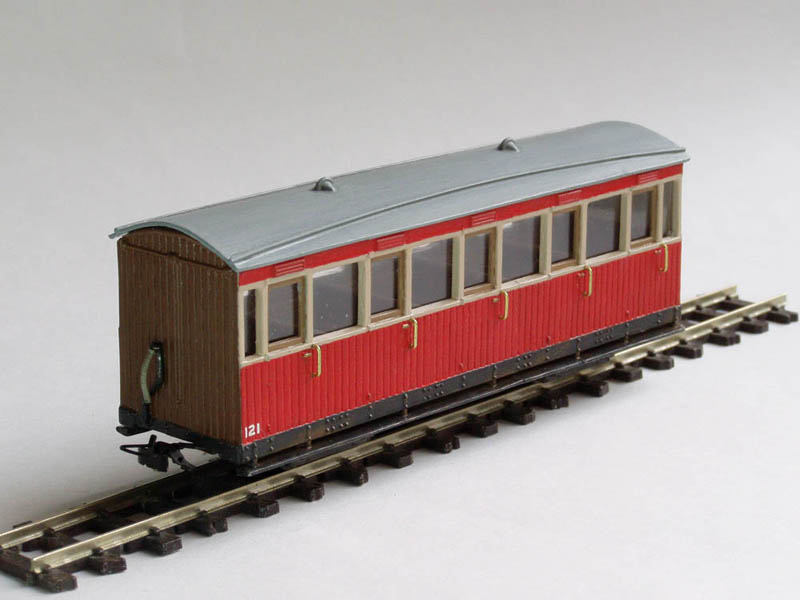
I built the coaches much as Mick did, except for reducing the compartment walls by 1.5mm to clear the way for the base of the removable roof. As footboards I used a scale 18" Evergreen L section which at 3.2mm wide matches the VoR ones.
The roofs were fitted with nothing more than rain strips and torpedo ventilators, as these newly built carriages will be fitted with "electric" lighting as opposed to the older ones lit by oil lamps. During construction I found that the space for the bogies to swing was limited by the tumblehome of the sides. I therefore decided to add 1mm to the width of any future construction.
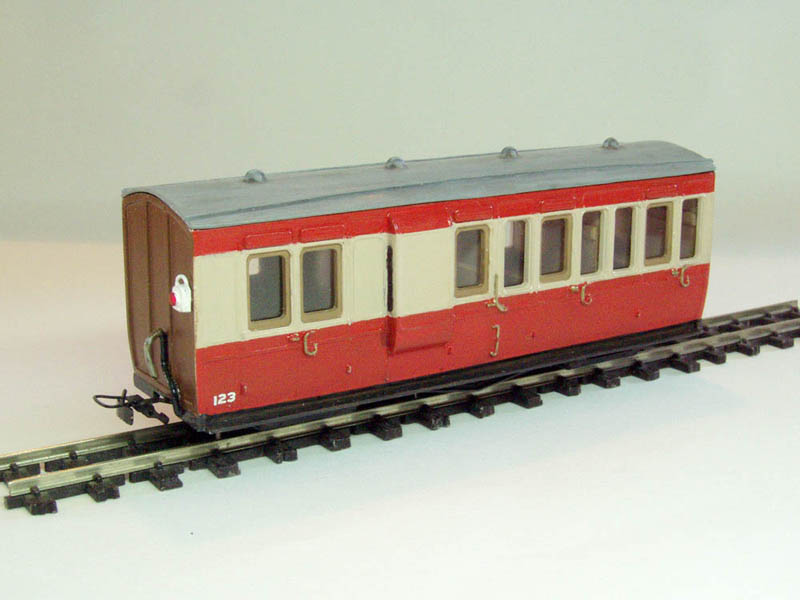
The brake 3rd is fitted with a working tail light similar to the one fitted in a Corris brake van which I recently built. This is described in another tale: the "Simple 'lectric" which describes my battery powered tail lights.
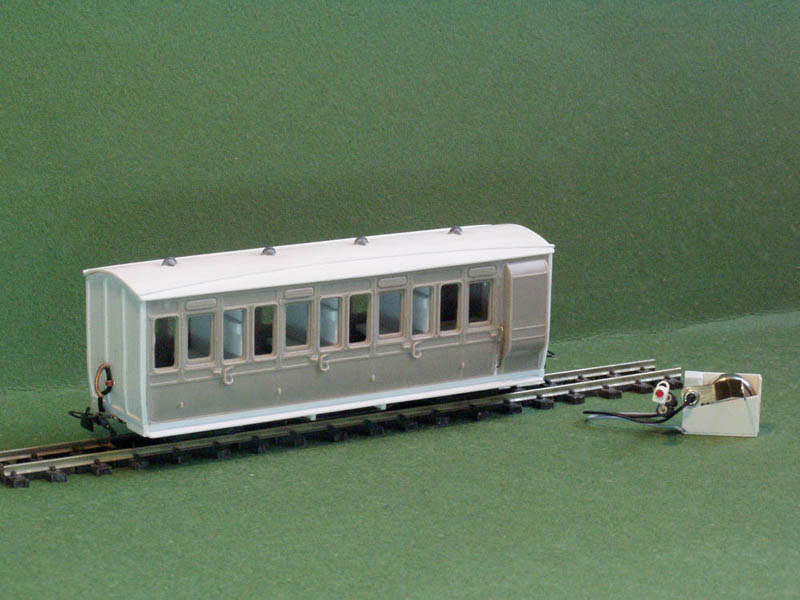
Completed brake third with working tail light:
The shortened Rheidol coach:
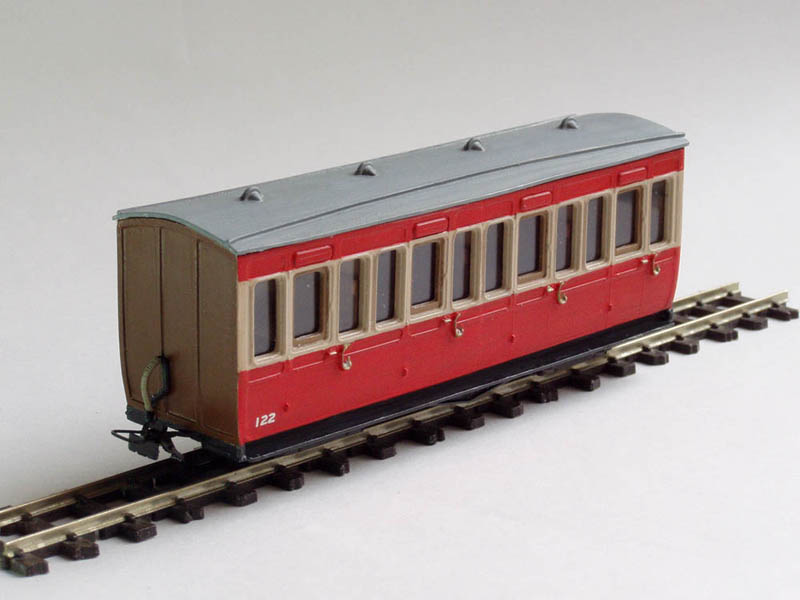
Completed Ratio four-compartment all-third:
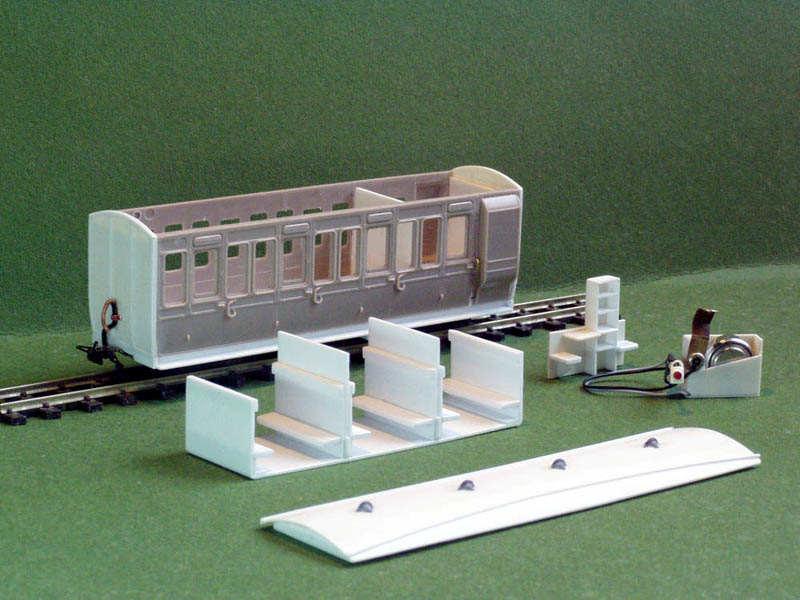
The brake end under construction, showing the interior units and the tail light assembly. The roof is detachable:
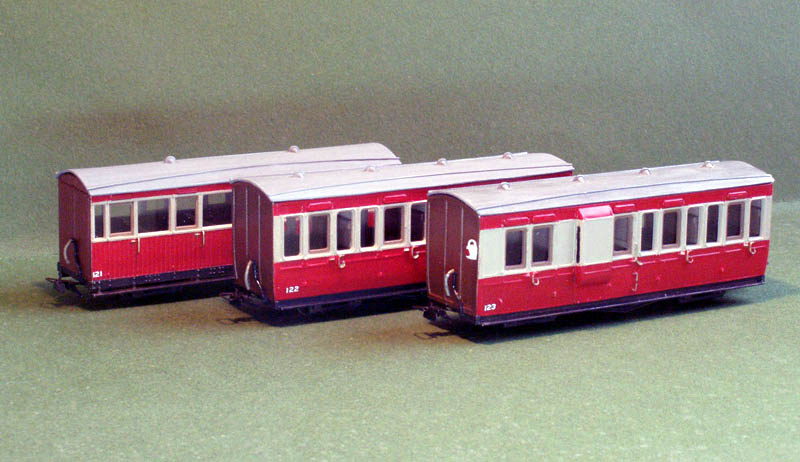
Trio of kitbashed coaches:
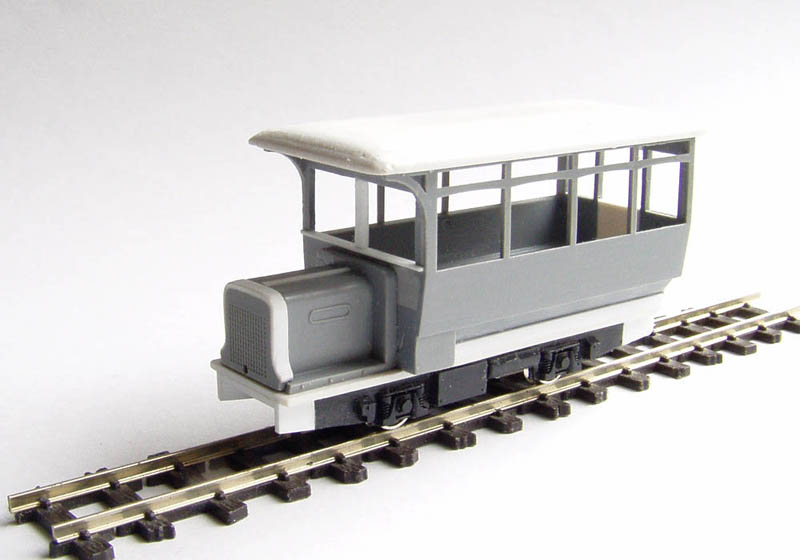
4 - Railbus set
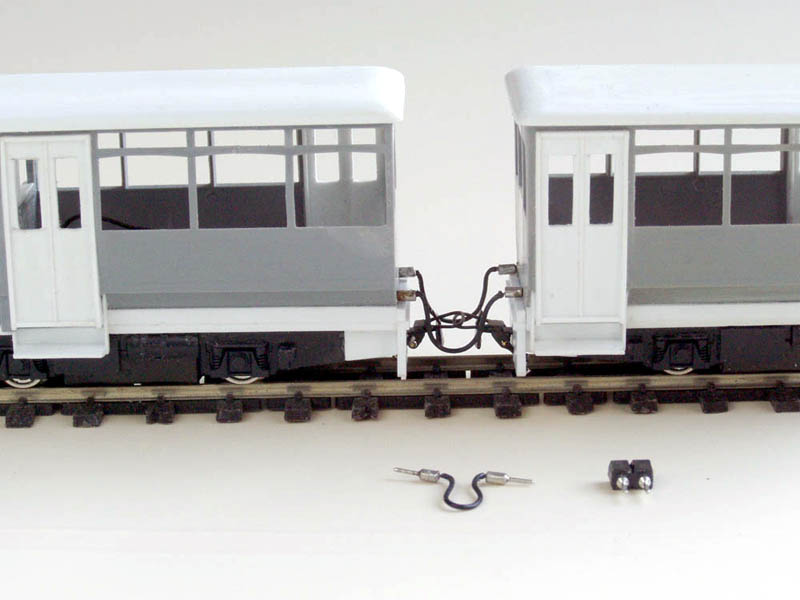
Apart from Pendre, a pair of railbuses were made on two Kato 4-wheel chassis. The pair of railbuses was made of Keilkraft London 'B' type bus kits. They are connected together electrically by flexible leads and printed circuit connectors.
A single railcar:
The flexible electrical connections, using PCB connectors:
Unpainted railcars on a test run over on the SBL layout:
More photos